








Ashtanga Yoga Poses for Beginners: 10 Postures to Start With
Table of Contents
- Before The First Pose: Three Things Every Posture Asks of You
- 10 Ashtanga Yoga Poses for Beginners
- 1. Samasthiti — Equal Standing
- 2. Surya Namaskar A — Sun Salutation A
- 3. Surya Namaskar B
- 4. Padangusthasana — Big Toe Pose
- 5. Pada Hastasana — Hand Under Foot Pose
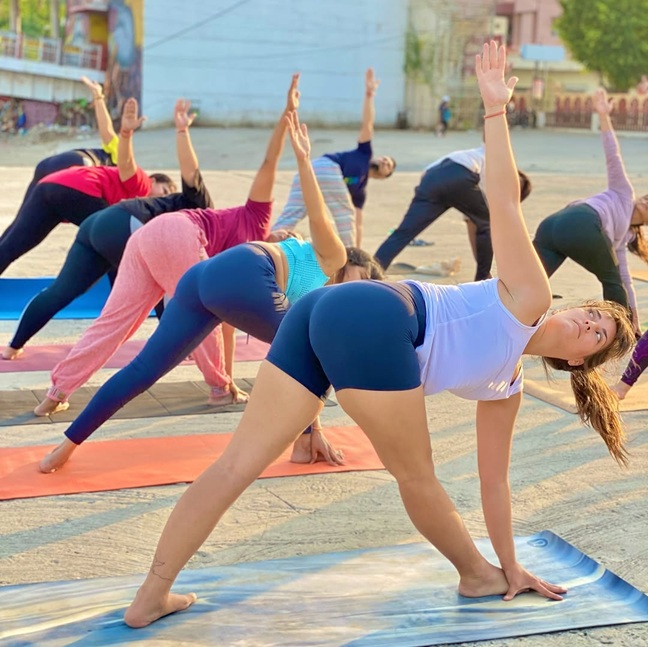
- 6. Utthita Trikonasana — Extended Triangle
- 7. Utthita Parsvakonasana — Extended Side Angle
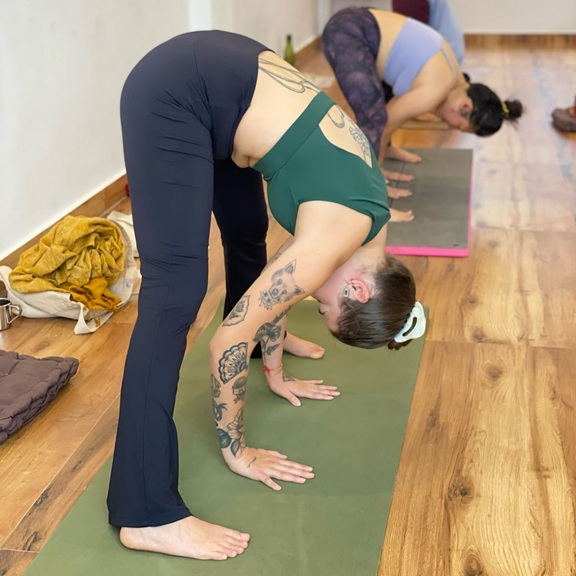
- 8. Prasarita Padottanasana A — Wide-Legged Forward Fold
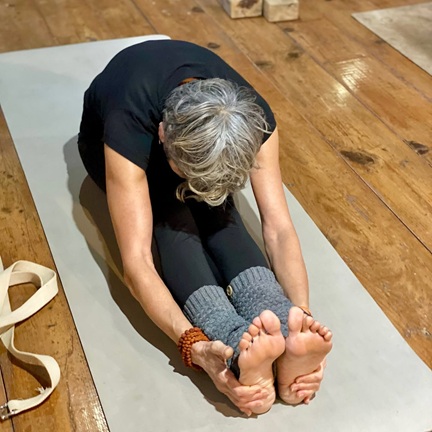
- 9. Dandasana into Paschimottanasana — Staff Pose into Seated Forward Bend
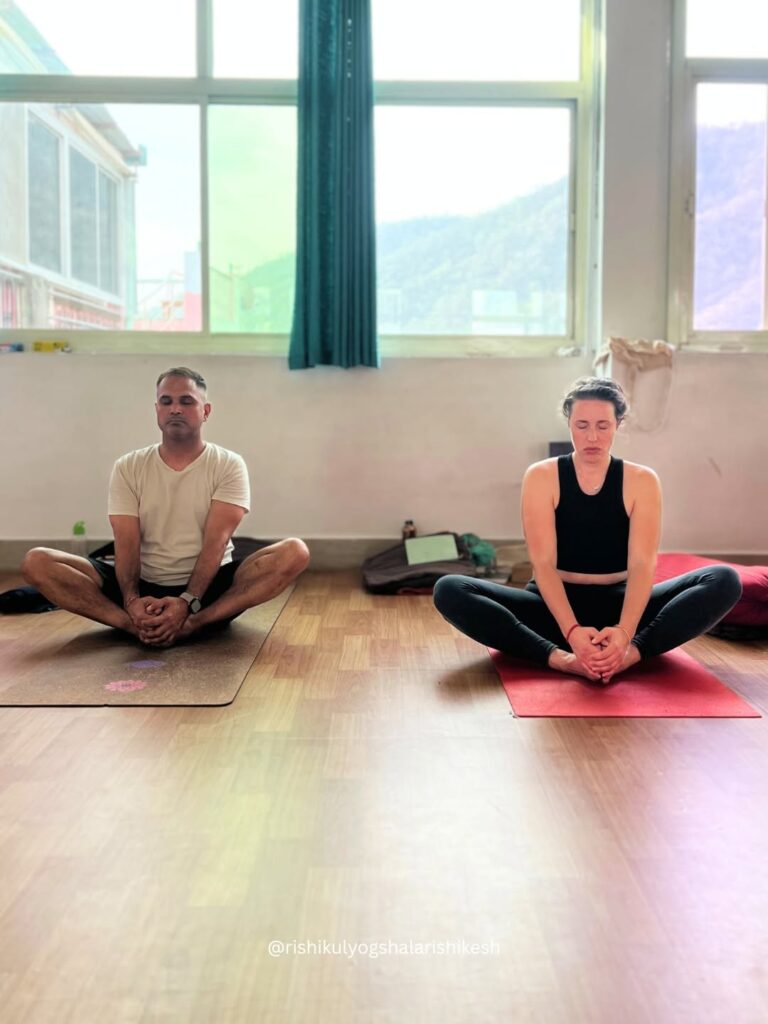
- 10. Baddha Konasana — Bound Angle Pose
- Putting The Ten Poses Together
- Poses to Leave Alone For Now
- Who Should Modify These Poses
- Final Take
- Ashtanga Yoga Poses – FAQs
- Which Ashtanga poses should a beginner start with?
- How long should I hold each Ashtanga pose?
- Do I need to be flexible to do these poses?
- Can I practise these Ashtanga poses at home?
- How many times a week should I practise?
- What if I can’t touch my toes in Padangusthasana?
- Should I practise Ashtanga poses before or after eating?
Every new student who walks into our Ashtanga class asks the same question in the first week: which poses should I actually be doing?
It’s a fair question, because the answer isn’t obvious. The full sequence has around seventy postures. Nobody hands you seventy postures on day one. You are given a handful, you work on them until they stop feeling foreign, and then you’re given the next one.
This guide is that handful. Ten postures, in the order you’d meet them on the mat, with the breath cue for each, the mistake I correct most often, and what to do if your body isn’t there yet. If you want the story of where the practice came from or how the full series is structured, I’ve written about that separately — this page is about the poses themselves.
Before The First Pose: Three Things Every Posture Asks of You
You can learn the shape of a posture from a photograph. These three things are what turn the shape into Ashtanga, and they apply to all ten poses below.
Ujjayi breath. Narrow the back of your throat slightly and breathe in and out through the nose, so the breath makes a soft rushing sound. Every movement below happens on an inhale or an exhale — never in between. When you can’t hold the breath steady, you’ve gone too deep. Come back.
Bandha. A light lift at the pelvic floor (mula bandha) and a gentle drawing-in below the navel (uddiyana bandha). This protects your lower back in every forward fold on this list. Beginners always overdo it. Think of it as twenty percent effort held quietly, not a clench.
Drishti. A fixed gazing point for each posture. I’ve listed one for every pose below. It sounds like a small detail, and it is the single biggest difference between practising and just exercising, because it stops your eyes wandering around the room.
Five breaths is the standard hold. Count them, don’t estimate them.
10 Ashtanga Yoga Poses for Beginners
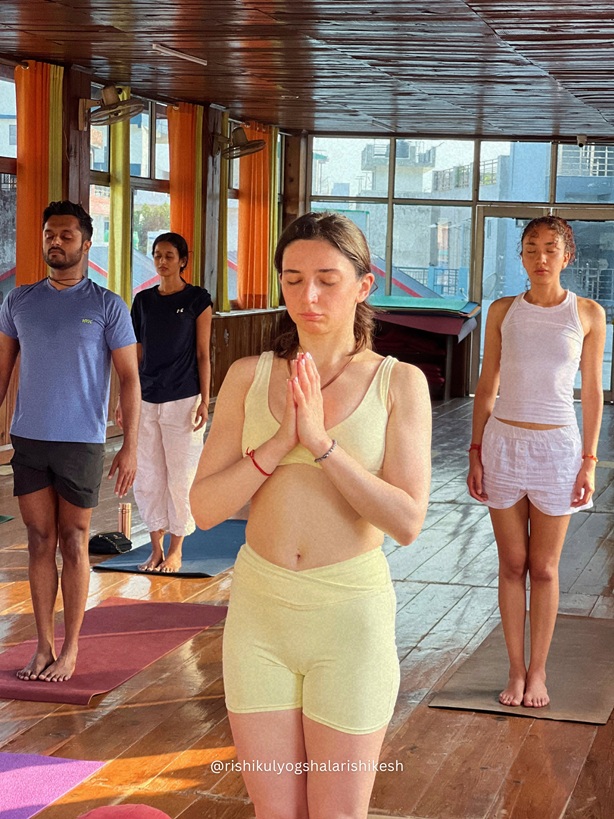
1. Samasthiti — Equal Standing
Where the practice starts and where it returns between postures. It looks like standing still. It isn’t.
- Big toes touching, heels a fraction apart.
- Lift the kneecaps by firming the thighs. Legs strong, knees not locked back.
- Let the tailbone lengthen down so the lower back stops arching.
- Shoulders roll up, back, and down. Arms hanging, palms facing the thighs.
- Crown of the head stacked over the centre of the pelvis. Jaw soft.
Drishti: tip of the nose.
Most common mistake: pushing the ribs forward and calling it good posture. Draw the front lower ribs gently down toward the hips.
More detail on this posture: Mountain Pose (Tadasana) — full guide
2. Surya Namaskar A — Sun Salutation A
Five rounds, nine breath-linked movements each. This is what warms the body for everything that follows, and it’s where most of your first month will go.
The spine of it: inhale arms up → exhale fold → inhale flat-back lift → exhale back to Chaturanga Dandasana → inhale Urdhva Mukha Svanasana (Upward-Facing Dog) → exhale Adho Mukha Svanasana (Downward-Facing Dog), hold five breaths → inhale look forward → exhale feet to hands → inhale lift → exhale fold → inhale rise → exhale Samasthiti.
Drishti: thumbs when the arms are up, navel in Downward Dog.
Most common mistake: letting the shoulders drop below the elbows in Chaturanga. Lower your knees to the floor first. A collapsed Chaturanga repeated forty times a week becomes a shoulder injury.

Step-by-step breakdown: Surya Namaskar: the 12 poses, step by step
3. Surya Namaskar B
The same structure, with Utkatasana (Chair Pose) opening and closing it and Virabhadrasana I (Warrior I) on each side in the middle. Traditionally five rounds; take three if five leaves you breathless. The breath decides the number, not your ego.
Drishti: thumbs.
Most common mistake: rushing the transitions to keep up with the room. One movement, one breath. If you’re moving faster than your breath, you’re not doing Ashtanga.
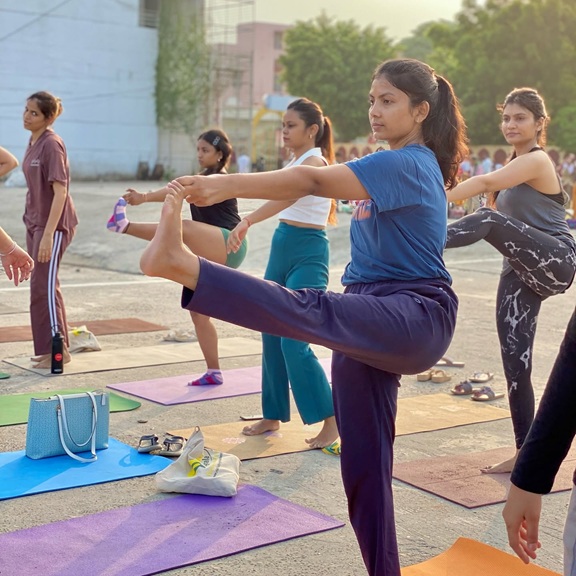
4. Padangusthasana — Big Toe Pose
The first standing posture after the Sun Salutations.
- Step the feet hip-width apart.
- Inhale, lengthen. Exhale, fold from the hip creases — not from the waist.
- Hook the first two fingers of each hand around the big toe, thumb pressing down on top.
- Inhale, straighten the arms, lift the chest, look forward, spine long.
- Exhale, bend the elbows out to the sides and fold. Five breaths.
Drishti: tip of the nose.
Most common mistake: rounding the upper back to reach the toes. Bend your knees as much as you need. A long spine with bent knees is the posture; a rounded spine with straight legs is not.
5. Pada Hastasana — Hand Under Foot Pose
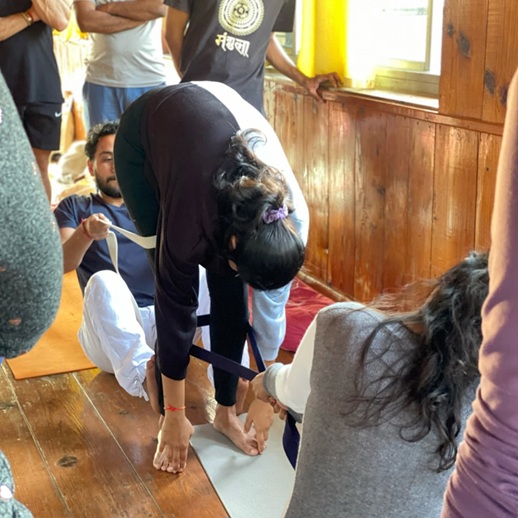
This follows straight on from the previous pose. You don’t stand up in between.
- Still folded, release the toes and slide your palms face-up beneath the soles of the feet, until the toes reach the wrist creases.
- Shift a little weight forward into the balls of the feet.
- Inhale, lift the chest and look up. Exhale, fold, elbows drawing out and back. Five breaths.
- Inhale, look up. Exhale, release. Inhale, come all the way up.
Drishti: tip of the nose.
If your wrists or hamstrings say no: hold opposite elbows and let the head hang instead. Nothing is lost.
6. Utthita Trikonasana — Extended Triangle
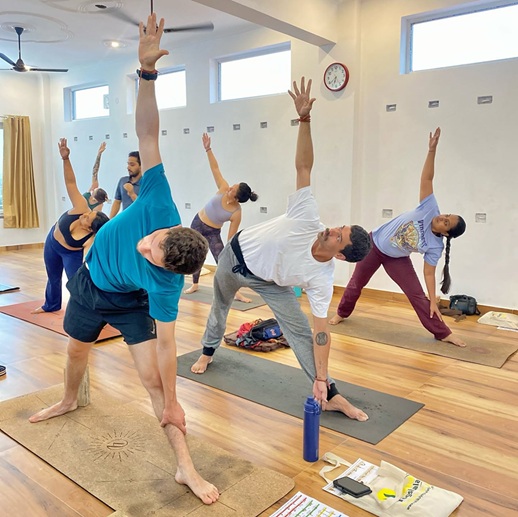
- Step the feet about a leg’s length apart, arms out at shoulder height.
- Turn the right foot out ninety degrees, left foot in slightly. Right heel roughly in line with the left arch.
- Exhale and extend sideways over the right leg, taking the right big toe with the first two fingers.
- Left arm straight up, palm facing forward. Turn to look at the left thumb. Five breaths, then repeat left.
Drishti: the raised thumb.
Most common mistake: dumping weight into the bottom hand and collapsing the lower ribs. Keep both sides of the waist the same length. If the toe is far away, rest the hand on the shin or a block — never on the knee joint.
7. Utthita Parsvakonasana — Extended Side Angle
- Same stance, slightly wider. Bend the right knee to ninety degrees, stacked directly over the ankle.
- Right hand to the floor outside the right foot. Forearm on the thigh is a perfectly good alternative.
- Left arm sweeps over the ear so there’s one long line from the left heel to the left fingertips. Look up past the arm. Five breaths each side.
Drishti: the raised hand.
Most common mistake: the back leg goes passive. Press hard through the outer edge of the back foot the whole time, or the posture has no foundation.
8. Prasarita Padottanasana A — Wide-Legged Forward Fold
- Step wide, feet parallel, hands on hips.
- Inhale, lengthen the spine. Exhale, fold forward and place the hands on the floor between the feet, shoulder-width apart, fingers in line with the toes.
- Inhale, look up, spine flat. Exhale, bend the elbows straight back and lower the crown of the head toward the floor. Five breaths.
Drishti: tip of the nose.
Most common mistake: letting the weight fall into the heels. Keep it slightly forward, over the balls of the feet, or you’ll never find the fold. And if the head is nowhere near the floor, that’s completely normal — most people take a year.
9. Dandasana into Paschimottanasana — Staff Pose into Seated Forward Bend
The first seated posture, and where most people properly meet their hamstrings.
Dandasana: sit with legs straight, feet flexed, hands beside the hips, spine tall, chest open. Five breaths. This is the seated equivalent of Samasthiti and it is doing more than it looks.
Paschimottanasana:
- Inhale, reach the arms up and lengthen.
- Exhale, hinge from the hips and take hold of the feet, the ankles, or the shins — wherever you land without rounding.
- Inhale, look up and lengthen the spine. Exhale, fold. Five breaths.
Drishti: the toes.
Most common mistake: hauling yourself down with the arms. That strains the lower back and does nothing for the hamstrings. Lead with the chest toward the feet. Sit on a folded blanket if your lower back rounds the moment you sit down — that one change fixes half the problem.
10. Baddha Konasana — Bound Angle Pose
A hip opener, and a good place to end a beginner practice before resting.
- Sit tall, bring the soles of the feet together and draw the heels in toward the pelvis.
- Hold the feet and gently open them like a book, thumbs pressing into the inner edges.
- Let the knees drop toward the floor under their own weight. Inhale, lengthen. Exhale, fold forward from the hips. Five breaths.
Drishti: tip of the nose.
Most common mistake: pushing the knees down with the hands or elbows. The knee is not the joint you’re opening — the hip is. Force here causes real injuries. Sit on a cushion so the hips are above the knees and let gravity do the work over months.
Finish flat on your back in Savasana for at least five minutes. It isn’t optional, and it isn’t a nap. It’s how the practice settles.
Putting The Ten Poses Together
Here is a sequence for someone practising at home, five or six mornings a week:
| Order | Posture | Time |
|---|---|---|
| 1 | Samasthiti — 5 breaths | 1 min |
| 2 | Surya Namaskar A × 5 | 8 min |
| 3 | Surya Namaskar B × 3 | 7 min |
| 4 | Padangusthasana → Pada Hastasana | 3 min |
| 5 | Utthita Trikonasana, both sides | 2 min |
| 6 | Utthita Parsvakonasana, both sides | 2 min |
| 7 | Prasarita Padottanasana A | 2 min |
| 8 | Dandasana → Paschimottanasana | 3 min |
| 9 | Baddha Konasana | 2 min |
| 10 | Savasana | 5 min |
That’s about thirty-five minutes, and it is a genuine, complete Ashtanga practice. Stay with exactly this for three months before adding anything. I’ve watched hundreds of students test consistency against ambition, and consistency wins every time.
Poses to Leave Alone For Now
Beginners tend to jump ahead to the postures that photograph well. These are the ones I’d ask you to wait on:
- Kurmasana and Supta Kurmasana — deep hip and shoulder demand, easy to strain the lower back.
- Bhujapidasana and the arm balances — the wrists need months of Chaturanga first.
- Garbha Pindasana, Kukkutasana, and the lotus-based finishing postures — forcing lotus is the most common serious knee injury in this practice.
- Sirsasana (Headstand) — learn it with a teacher watching, never from a video.
Nothing on that list is off-limits forever. It’s a question of order.
Who Should Modify These Poses
- Recent wrist, shoulder, or lower-back injury — get medical clearance before the Sun Salutations. Chaturanga is a real load.
- Pregnancy — the deep forward folds and closed twists here aren’t appropriate. Prenatal yoga is the right route.
- Knee problems — approach Baddha Konasana with caution and skip anything lotus-based entirely.
- High blood pressure or eye conditions — keep the head above the heart; ask a doctor before inversions.
- Stiff hamstrings — bend your knees in every forward fold on this list. This is not a compromise; it’s correct technique.
Final Take
Ten postures practised honestly will take you further than seventy rushed through. The first weeks won’t feel graceful — hamstrings object, shoulders complain, knees sit far from the floor. That’s the practice working. Stay with these ten until they feel like yours, then add the next one.
If you want to understand why the sequence is built this way and learn it with daily correction on the mat, that’s what a Yoga Teacher Training in India gives you — twice-daily practice, anatomy and philosophy alongside the asana, and a teacher watching your breath every morning.
Ashtanga Yoga Poses – FAQs
Which Ashtanga poses should a beginner start with?
Samasthiti, Surya Namaskar A and B, Padangusthasana, Pada Hastasana, Utthita Trikonasana, Utthita Parsvakonasana, Prasarita Padottanasana A, Paschimottanasana and Baddha Konasana. That’s a complete practice on its own.
How long should I hold each Ashtanga pose?
Five ujjayi breaths is the standard, roughly 25 to 40 seconds. Downward-Facing Dog inside the Sun Salutations is also held for five. Count the breaths rather than watching a clock.
Do I need to be flexible to do these poses?
No. Every forward fold on this page can be done with bent knees, and every seated posture can be done sitting on a folded blanket. Flexibility is what the poses produce, not what they require.
Can I practise these Ashtanga poses at home?
Yes, once someone has watched your Chaturanga and your forward folds at least a few times. Those two shapes cause almost every Ashtanga injury I see, and they’re very hard to self-correct from a video.
How many times a week should I practise?
Traditionally six mornings, resting on Saturdays. Three sessions a week done consistently will build a real practice. One long weekend session will not.
What if I can’t touch my toes in Padangusthasana?
Bend your knees until you can, or hold your shins. Reaching the toes with a rounded spine teaches your body the wrong shape and gets you nowhere. A long spine is always the priority.
Should I practise Ashtanga poses before or after eating?
Before. Traditionally on an empty stomach in the early morning. If you’ve eaten a full meal, leave two to three hours.

 +91-8433225327,
 Rishikul Yogshala Rishikesh, Narayan Kunj, Jonk Village, Ram Jhula, Swarg Ashram, Rishikesh, Uttarakhand 249304
 By Airway
 By Railway
 By Bus/Cabs